


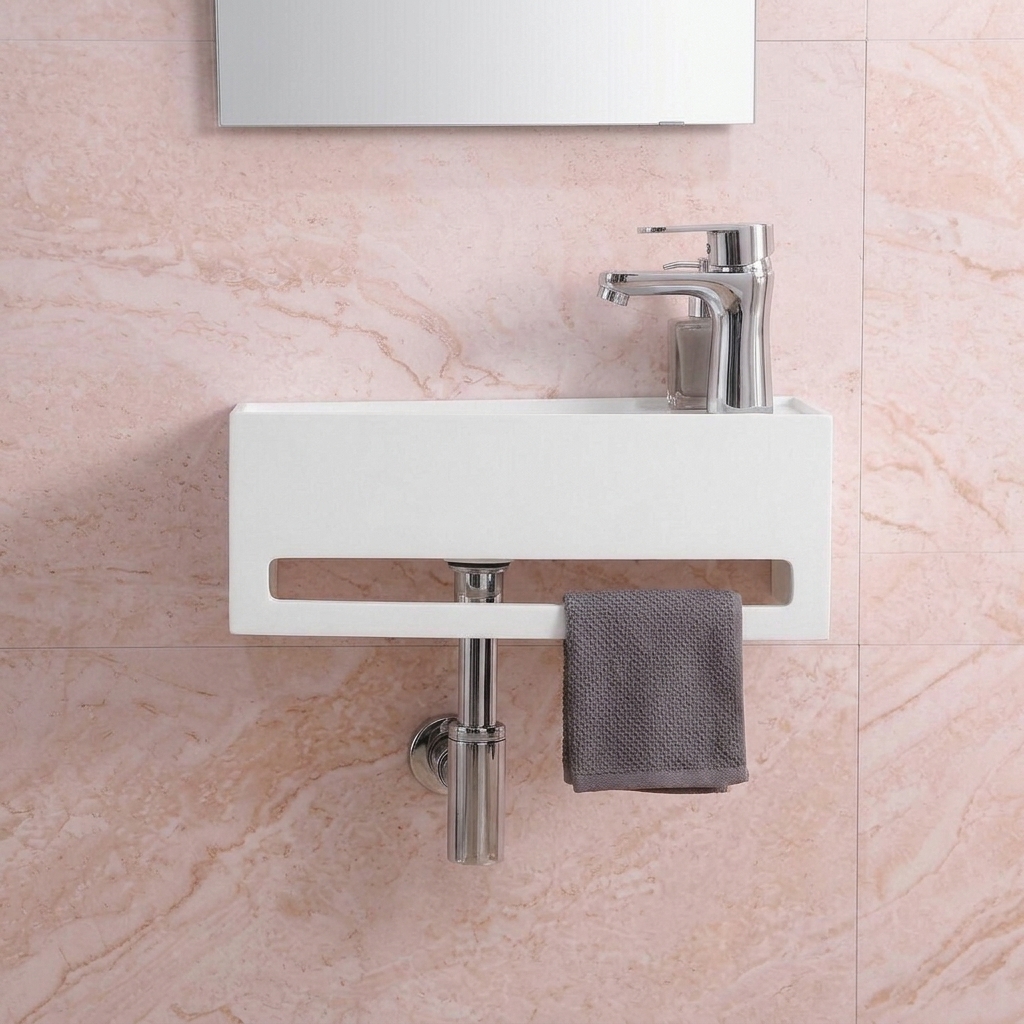
Small Basin For Toilet Plumbing: Water Supply And Drainage Considerations
Installing a compact toilet basin requires careful plumbing preparation. Even when the fixture takes up very little space, its water supply and drainage connections must support reliable everyday use. Incorrect pipe positioning can lead to exposed fittings, slow drainage, leaks, or difficult maintenance after installation.
Before purchasing a Small basin for toilet, check the existing plumbing layout and compare it with the basin’s specifications. The position of the water outlets, waste connection, faucet, and trap all affect the final installation. Planning these details early helps prevent unnecessary pipe alterations and keeps the wash area functional.
Understanding The Plumbing Requirements Of A Small Toilet Basin
A basin needs two main plumbing systems: a water supply that delivers water to the faucet and a drainage system that carries used water away. Both systems must align with the basin design and available installation space.
Compact toilets often have limited room behind or underneath the fixture. This makes accurate pipe positioning particularly important. A connection that works for a standard pedestal basin may not fit neatly behind a wall-mounted model.
The installation plan should account for:
- Hot and cold water supply connections, where applicable.
- Faucet type and water inlet positions.
- Waste outlet location and diameter.
- Trap dimensions and available clearance.
- Access to shutoff valves and plumbing joints.
- Wall or floor drainage arrangements.
Reviewing these requirements before installation gives the plumber a clear understanding of the work involved.
Water Supply Considerations
The water supply needs to provide a consistent flow without creating unnecessary pressure or connection problems. The pipe arrangement depends on the faucet and basin design.
Hot And Cold Water Connections
Many bathroom basins use separate hot and cold water supplies connected to a mixer faucet. The pipes usually terminate below or behind the basin, where flexible connectors link them to the tap.
Measure the distance between the supply outlets and the faucet connections before installation. The pipes should reach the tap without excessive bending or tension.
Some guest toilets use a cold-water-only faucet. This arrangement may simplify the plumbing, although the choice depends on household requirements and local plumbing regulations.
Positioning The Water Outlets
The water outlets should sit where the basin and faucet leave enough room for the connecting hoses and shutoff valves. Poor positioning can make the fittings difficult to access or force the installer to use awkward pipe bends.
Before fixing the outlets, confirm the basin’s mounting height and faucet arrangement. Use the manufacturer’s installation drawing rather than estimating pipe positions from the external basin dimensions.
Water Pressure And Flow Control
A compact bowl may not handle a strong water stream as comfortably as a larger basin. Excessive flow can cause splashing, especially when the bowl is shallow or the faucet spout sits too high.
Check the recommended operating pressure for the faucet. An aerator or suitable flow regulator can help produce a controlled stream and reduce unnecessary water use.
Shutoff Valves For Easier Maintenance
Individual shutoff valves allow the water supply to be isolated during repairs without turning off water to the entire property. Install them in an accessible position beneath the basin or inside an appropriate service area.
Avoid hiding the valves permanently behind sealed panels. Easy access makes routine maintenance and emergency repairs more manageable.
Drainage Requirements For A Compact Basin
A suitable drainage system removes used water quickly and helps prevent standing water, unpleasant odors, and leaks. Its layout should match the basin’s waste outlet and the building’s existing drainage connection.
Waste Outlet Size And Compatibility
Check the basin manufacturer’s specified waste outlet size before purchasing the drain fitting. The waste assembly must match the opening and connect properly with the trap.
Using incompatible fittings may cause leaks or require unnecessary adapters. Confirm the complete connection rather than checking only the visible drain opening.
Correct Drain Pipe Position
The drain pipe should align with the basin waste outlet and leave enough room for the trap. Measure its height and horizontal position from the finished wall or floor.
For a wall-mounted basin, the drain connection often sits behind or below the bowl. A pedestal model may conceal some of the pipework inside its column, although the available space depends on the design.
Drainage Slope
Horizontal waste pipes need an appropriate downward gradient so water moves toward the main drain. A pipe that sits too flat may allow water and residue to collect, while an unsuitable steep arrangement can contribute to drainage problems.
The correct slope depends on the pipe diameter and applicable plumbing standards. A qualified plumber should determine the required gradient and support the pipe properly.
Preventing Drain Odors
A trap holds a small amount of water that creates a barrier against sewer gases entering the bathroom. Common options include bottle traps and P-traps, depending on the plumbing arrangement.
The selected trap must fit within the space beneath or behind the basin. It should also remain accessible for cleaning and clearing blockages.
Choosing The Right Trap For A Small Toilet Basin
The trap is an important part of the drainage system, yet its size and shape often receive little attention during basin selection.
Bottle Trap
A bottle trap has a compact vertical design and is often used with wall-mounted basins. Its shape can provide a neat appearance when the pipework remains visible.
Check its dimensions before installation. A trap that extends too far downward may interfere with storage or leave insufficient clearance underneath the basin.
P-Trap
A P-trap uses a curved section of pipe to connect the basin waste to a wall drainage outlet. It is common in installations where the waste pipe passes through the wall.
The position of the wall outlet determines whether this arrangement will fit without unnecessary bends.
S-Trap
An S-trap connects the basin waste to a floor drainage outlet. It may suit certain existing plumbing layouts, although its use and configuration must comply with local plumbing requirements.
Do not select a trap based on appearance alone. The drain outlet position should determine the suitable connection type.
Plumbing Differences Between Wall-Mounted And Pedestal Basins
The basin’s support style influences how water supply and drainage pipes are arranged.
Wall-Mounted Basin Plumbing
A wall-mounted basin leaves the floor underneath open, which helps maintain a spacious appearance. However, this design may expose the supply pipes and waste trap unless the plumbing sits inside the wall or a cover conceals it.
The wall must also support the basin securely. Plan the mounting brackets, water outlets, and waste connection together so they do not interfere with one another.
Pedestal Basin Plumbing
A pedestal basin provides a column that can conceal some of the drainage and supply connections. This can be useful when homeowners want to avoid visible pipework.
The pedestal limits the available space around the trap and supply hoses. Check the internal clearance before selecting the fittings.
The product range from kingkonree can serve as a reference when comparing compact basin dimensions and installation styles before planning the plumbing layout.
How To Plan Plumbing In A Very Small Toilet
Limited space makes pipe positioning more important. A practical layout should leave enough room for the basin, trap, faucet connections, and maintenance access.
Follow these planning steps:
- Measure the installation area: Record the available wall width, basin projection, and mounting height.
- Check existing connections: Locate the water supply pipes and drainage outlet before choosing the fixture.
- Review the basin specifications: Confirm the waste outlet position, faucet holes, and installation requirements.
- Select compatible fittings: Choose the faucet, waste assembly, trap, and connectors as one system.
- Allow maintenance clearance: Keep shutoff valves and removable trap sections accessible.
- Test before sealing: Check water flow, drainage, and all joints before closing access panels or completing wall finishes.
This sequence helps identify conflicts before the basin becomes permanently fixed in place.
Common Plumbing Mistakes To Avoid
Even a compact basin can develop problems when its plumbing receives little attention during installation. Avoid these common mistakes:
- Incorrect pipe alignment: Supply and waste outlets that do not match the basin can require extra fittings.
- Insufficient trap clearance: A bulky trap may interfere with the basin support or nearby storage.
- Poor drainage gradient: An unsuitable pipe slope can contribute to slow drainage and residue buildup.
- Hidden shutoff valves: Inaccessible valves make repairs more difficult.
- Incompatible faucet connections: The wrong hose length or fitting type may cause leaks.
- Unsealed joints: Poorly secured connections can allow water to escape inside cabinets or behind walls.
- Skipping leak tests: Unnoticed leaks may damage flooring, cabinets, and wall finishes.
Use fittings that meet local plumbing standards and follow the basin manufacturer’s instructions. A qualified plumber should handle pipe alterations and final connections.
Testing The Water Supply And Drainage After Installation
Once the basin is installed, test the entire system before treating the work as complete. Run the faucet at different flow levels and check the connections beneath the bowl.
Fill the basin partially, then release the water to observe how quickly it drains. Watch for standing water, gurgling sounds, or signs of leakage around the waste assembly.
Inspect the following areas:
- Faucet connections and flexible supply hoses.
- Shutoff valves and nearby pipe joints.
- Waste outlet and drain fitting.
- Trap connections and seals.
- Wall or floor drainage connection.
Also check for sewer odors after running the water. If drainage remains slow or smells persist, the plumber should inspect the trap and waste pipe arrangement.
Final Thoughts
Reliable plumbing is essential for a small toilet basin, regardless of its shape or mounting style. Water supply positions, faucet compatibility, waste outlet alignment, trap selection, and drainage slope all affect how well the fixture performs.
Measure the existing connections and review the basin specifications before installation begins. A carefully planned plumbing layout reduces the risk of leaks, drainage problems, and difficult maintenance, helping the compact wash area remain convenient for everyday use.